Creating a Camera Stream with Raspberry Pi Zero and Picamera2
Introduction
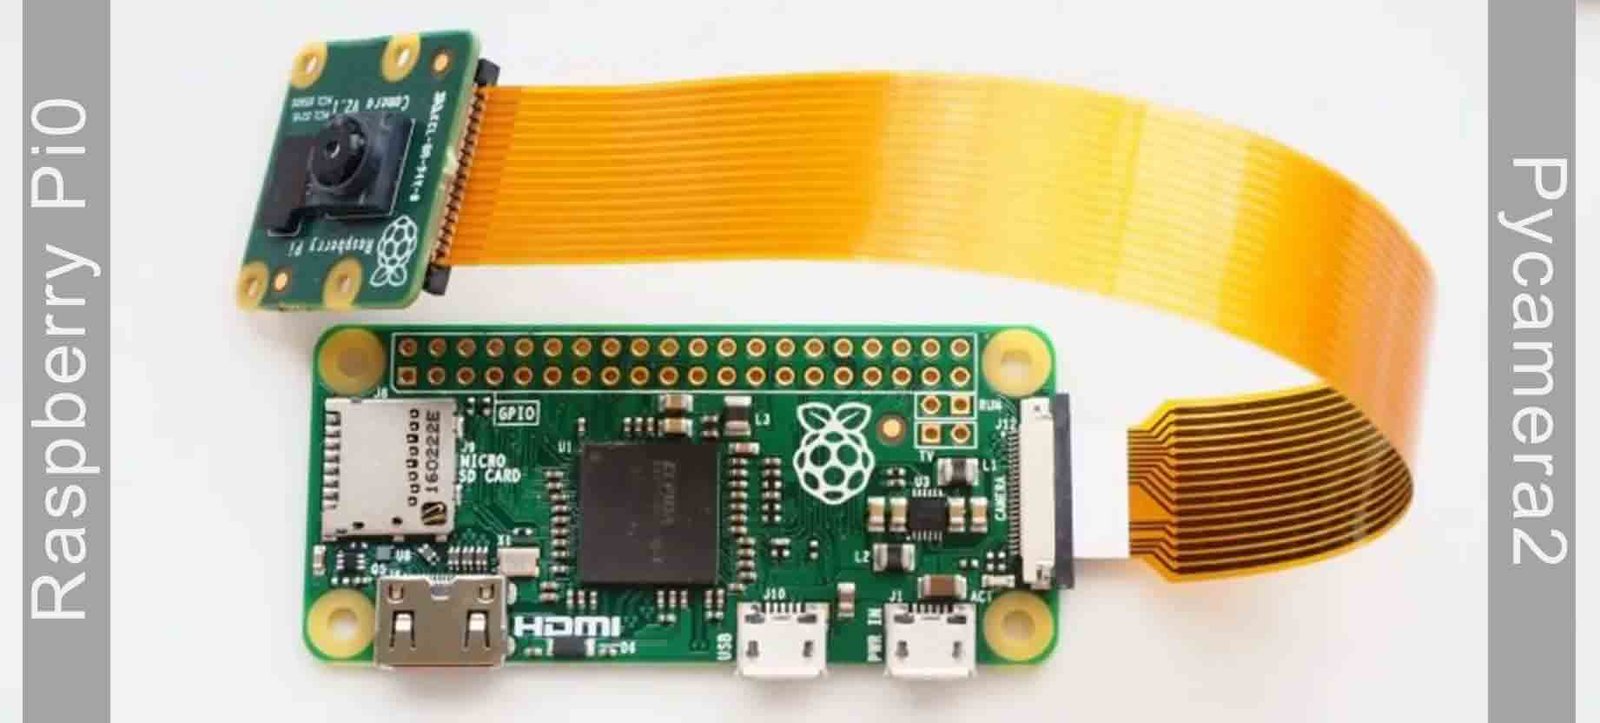
The Raspberry Pi Zero W is a compact and affordable single-board computer with built-in Wi-Fi and Bluetooth capabilities. One of its exciting features is the ability to connect a camera module and create a live video stream. In this blog post, we'll explore how to set up and stream video from a Raspberry Pi Zero W camera using the picamera library. Refer from here here
Prerequisites
Before getting started, make sure you have the following:
- Raspberry Pi Zero W board
- Raspberry Pi Camera Module (any version)
- MicroSD card with Raspbian OS installed
- Power supply for Raspberry Pi
- Access to a terminal or SSH connection to the Raspberry Pi
Setting Up the Raspberry Pi Zero W
- Connect Camera Module: First, attach the Raspberry Pi Camera Module to the Raspberry Pi Zero W's camera connector. Be gentle while doing this to avoid damaging the delicate ribbon cable.
- Enable Camera Interface: Use raspi-config to enable the camera interface. Open a terminal or SSH into your Raspberry Pi and run the below code. Navigate to "Interfacing Options" > "Camera" and enable the camera interface. Reboot the Raspberry Pi if prompted.
sudo raspi-config
- Install picamera Library: The picamera library allows us to control the camera module. Install it by running.
pip3 install picamera
Creating the Camera Stream Script
Now, let's create a Python script to capture video from the camera and stream it over a local network.
#!/usr/bin/python3

import io
import logging
import socketserver
from http import server
from threading import Condition
from picamera2 import Picamera2
from picamera2.outputs import FileOutput
from picamera2.encoders import MJPEGEncoder

class StreamingOutput(io.BufferedIOBase):
    def __init__(self):
        self.frame = None
        self.condition = Condition()

    def write(self, buf):
        with self.condition:
            self.frame = buf
            self.condition.notify_all()

class StreamingHandler(server.BaseHTTPRequestHandler):
    def do_GET(self):
        if self.path == '/':
            self.send_response(200)
            self.send_header('Age', 0)
            self.send_header('Cache-Control', 'no-cache, private')
            self.send_header('Pragma', 'no-cache')
            self.send_header('Content-Type', 'multipart/x-mixed-replace; boundary=FRAME')
            self.end_headers()
            try:
                while True:
                    with output.condition:
                        output.condition.wait()
                        frame = output.frame
                    self.wfile.write(b'--FRAME\r\n')
                    self.send_header('Content-Type', 'image/jpeg')
                    self.send_header('Content-Length', len(frame))
                    self.end_headers()
                    self.wfile.write(frame)
                    self.wfile.write(b'\r\n')
            except Exception as e:
                logging.warning('Removed streaming client %s: %s', self.client_address, str(e))

        else:
            self.send_error(404)
            self.end_headers()

class StreamingServer(socketserver.ThreadingMixIn, server.HTTPServer):
    allow_reuse_address = True
    daemon_threads = True

picam2 = Picamera2()
picam2.configure(picam2.create_video_configuration(
    main={"size": (640, 480)},
    controls={'FrameRate': 20}
))
output = StreamingOutput()
picam2.start_recording(MJPEGEncoder(), FileOutput(output))

try:
    address = ('', 8000)
    server = StreamingServer(address, StreamingHandler)
    server.serve_forever()
finally:
    picam2.stop_recording()
Running the Camera Stream
- Save the script to a file named camera_stream.py on your Raspberry Pi.
- Open a terminal or SSH into your Raspberry Pi.
- Navigate to the directory containing camera_stream.py and run the script.
sudo python3 camera_stream.py
- The script will start a web server on port 8000. You can access the camera stream by opening a web browser and navigating to http://raspberrypi.local:8000/.
Conclusion
In this tutorial, we've learned how to create a live camera stream with the Raspberry Pi Zero W using the picamera library. This opens up a world of possibilities for projects such as home surveillance, wildlife monitoring, or simply exploring the capabilities of the Raspberry Pi.
Experiment with different resolutions, framerates, and streaming options to tailor the camera stream to your needs. You can also enhance the web interface with additional HTML, CSS, or JavaScript for a more polished user experience.
The Raspberry Pi Zero W, combined with the Camera Module and picamera library, provides a powerful platform for creating versatile and affordable video streaming applications.
Happy streaming with your Raspberry Pi Zero W camera setup!
Explore these related topics for more information